#
02-16 Electric motor inspection and verification
Make sure the work can be done safely.
Deactivate the high voltage as per the MP-01-05-00-00-001 High-Voltage Circuit Deactivation Procedure for LG battery or MP-01-05-00-00-002 High-Voltage Circuit Deactivation Procedure for BMW battery.
Inspect the motor to make sure that there is no sign of damage.
Get access to the high-voltage cables (orange) and make sure they are still properly attached to the motor.
Inspect the cables for any signs of wear. If this is the case replace them.
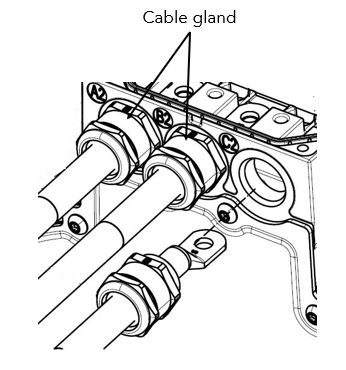
Locate the cable glands and make sure they are still tight (Figure 2), the torque is 8.9 lb-ft (12Nm).
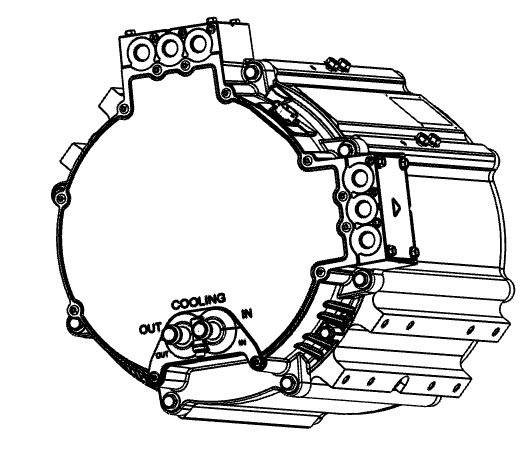
- Locate the motor cooling inlet and outlet ports and make sure there is no coolant leak and the clamps are in good condition (Figure 3).
- Locate the grounding strap and make sure it is still in good condition.
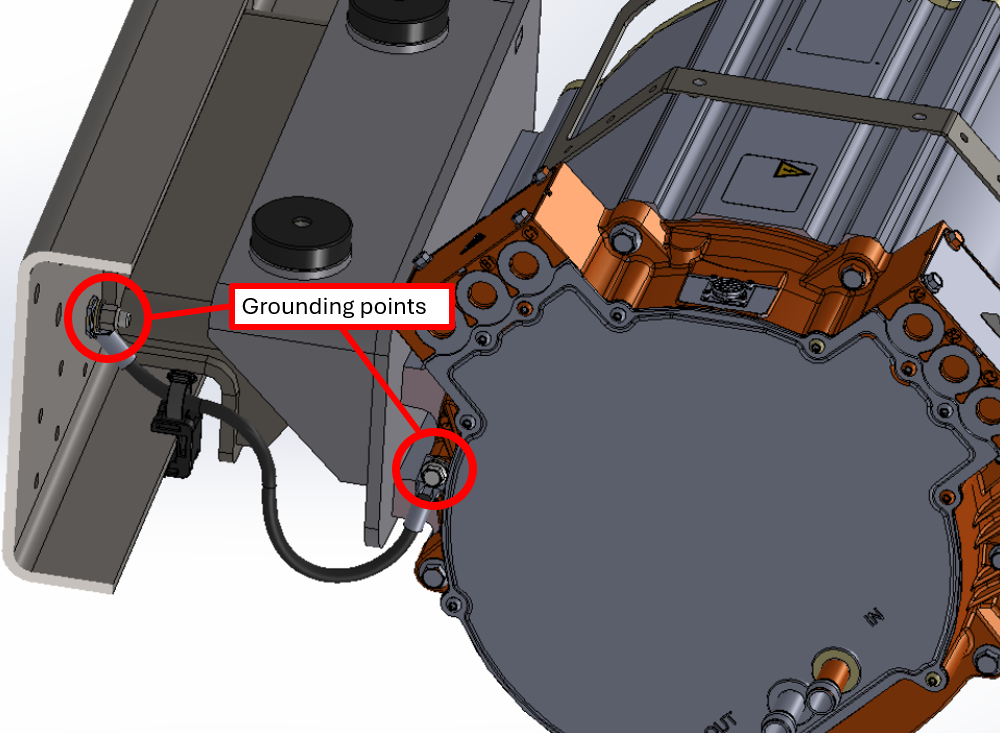
Make sure no dirt or any other substance is found between the ground strap lug and the motor casing.
Follow the ground strap to the chassis and make sure its grounding point is in good condition and still covered with protective grease.
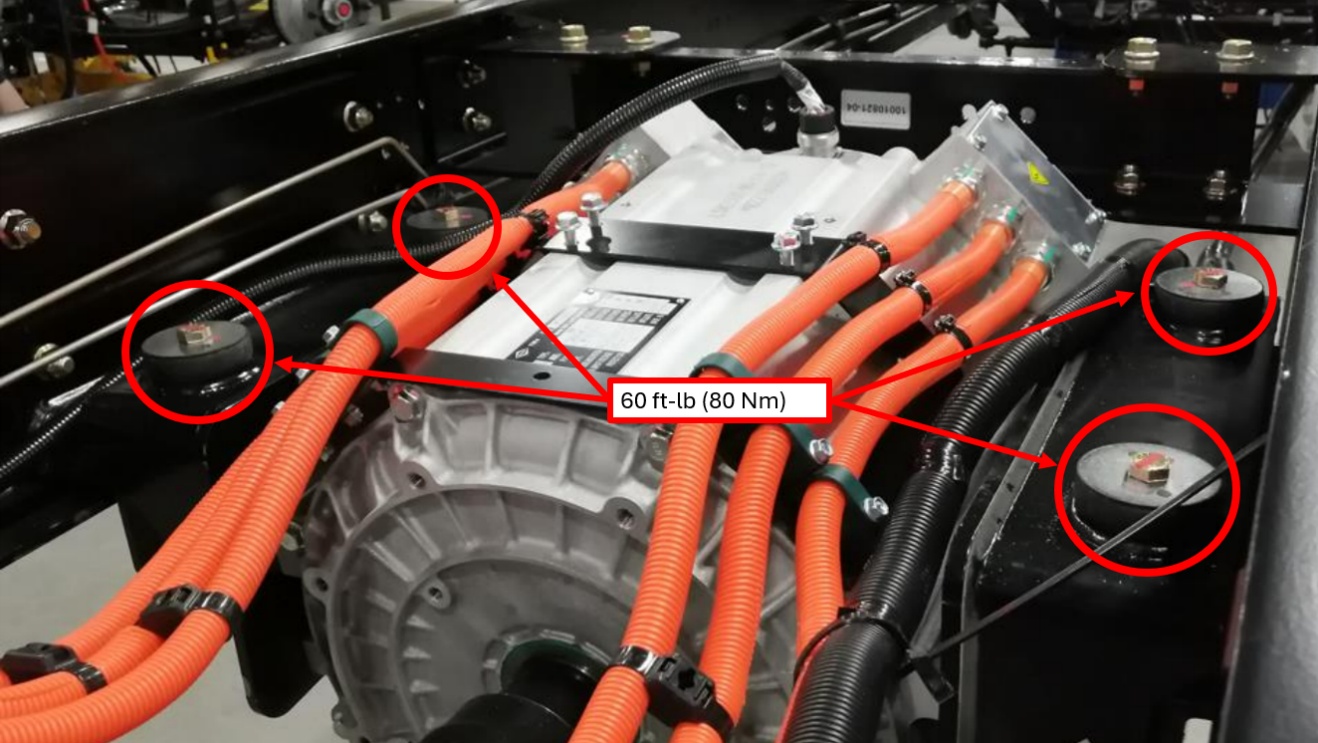
Inspect the rubber mounts that supports the motor to make sure that they are in good condition and properly torqued.
LionC Gen3 (with BMW battery) has 4 motor mounts (Figure 5) torqued to 60 ft-lb (80 Nm).
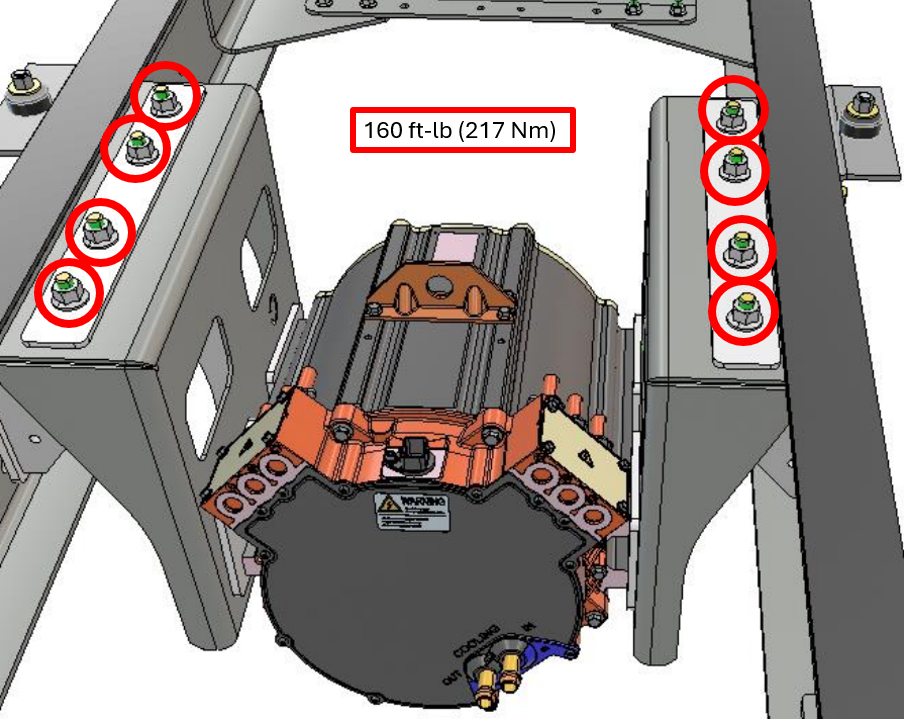
LionC Gen4 (with Lion battery) has 8 motor mounts (Figure 5)
torqued to 160 ft-lb (217 Nm).
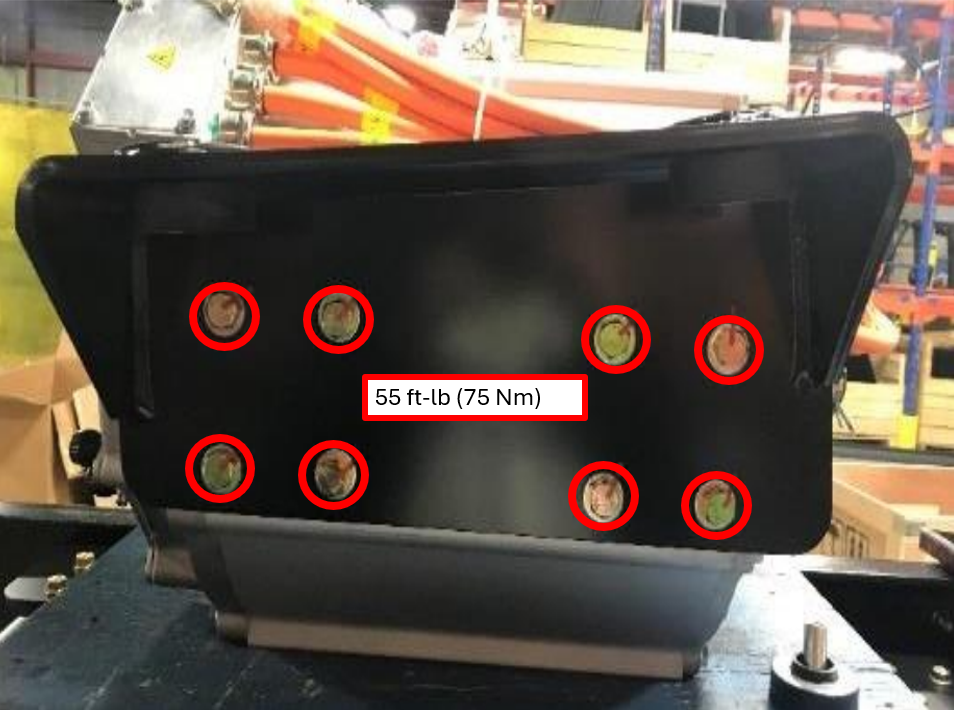
- Verify also that all 16 bolts securing the motor to the side brackets (Figure 7) are properly tightened to 55 ft-lb (75 Nm).
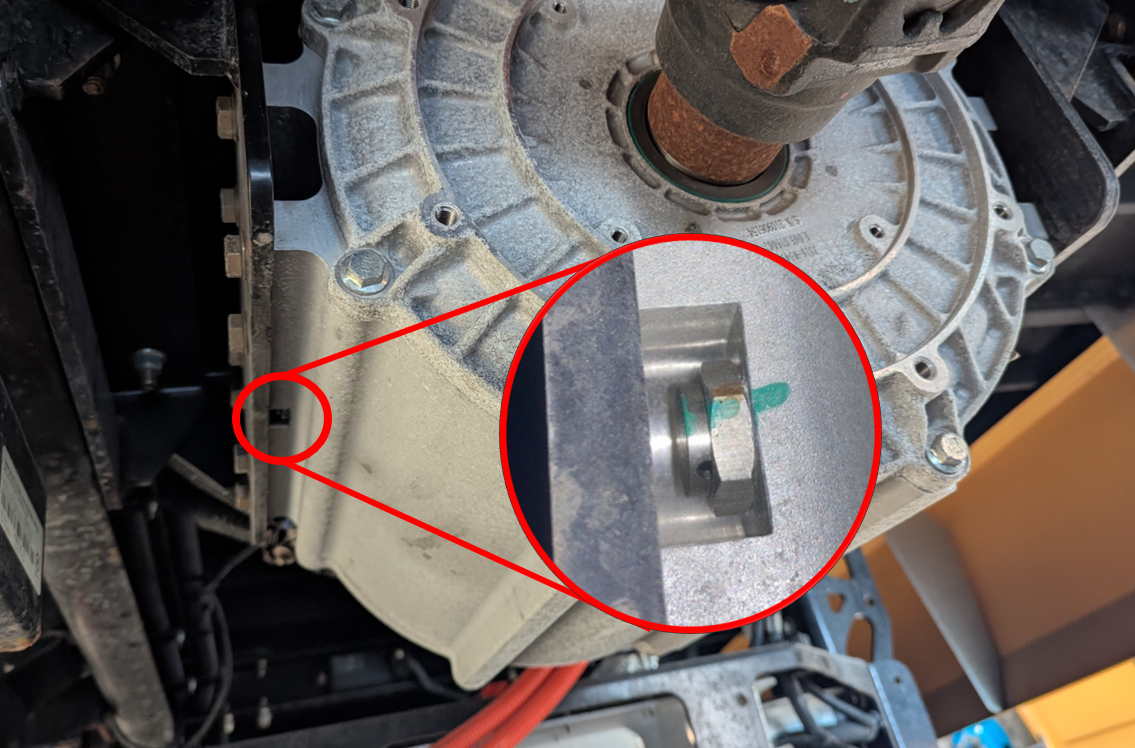
- Inspect the motor case vent (Figure 8) located on the driver side of the motor, nested under the left-hand side bracket. Make sure there is no accumulation of dust. Clean the vent, if required.