#
12-11 Parking Brake Inspection and Functionnal Test
#
Verification of the parking brake cable tension
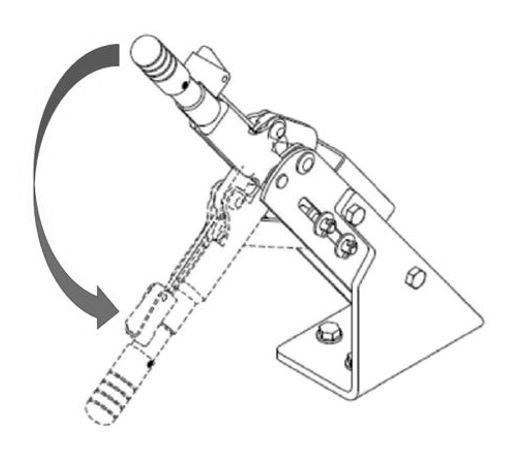
- Release the parking brake (Figure 1).
Go under the bus and inspect the parking brake cable routing.
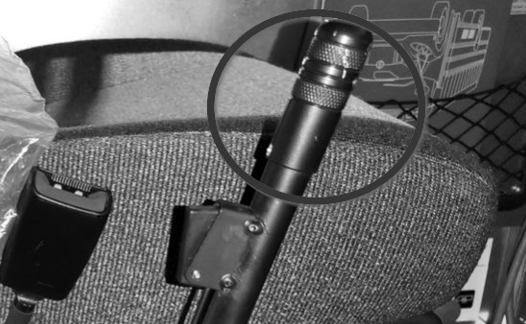
If the cable shows any slack, tighten the adjustment barrel by hand until all slack is removed (Figure 2). Don’t put the cable under tension.
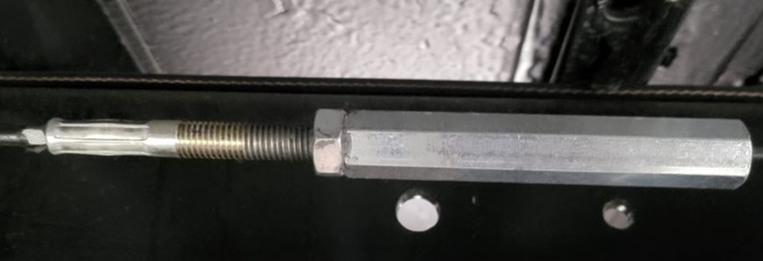
Once done, lock the adjustment barrel in place with the jam nut.
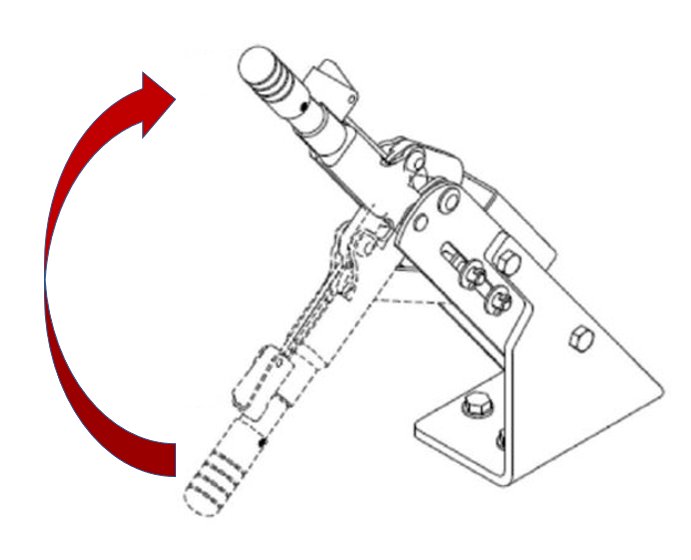
Engage the parking brake (Figure 3).
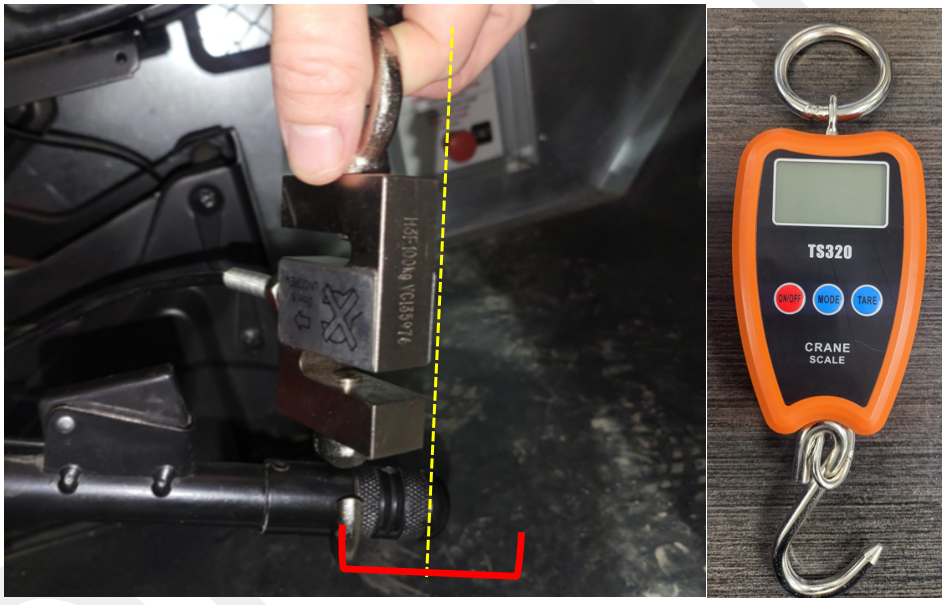
- Go under the vehicle and locate the parking brake cable tension accumulator (Figure 4).
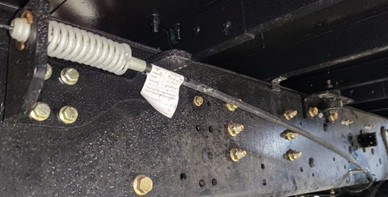
- Measure the length of the accumulator body protruding from the bracket on the opposite side of the spring. The correct length is 8 mm (Figure 5).

- If the length is not 8 mm, adjust the parking brake lever knob (Figure 6) until the accumulator spring is compressed 8 mm.
- Using a pull gauge, measure the maximum force required to engage the lever and apply the parking brake.
The effort measured should be between 35 and 50 lb. If it isn't, repeat the setting procedure.
- Place the pull gauge in the middle of the handle and pull straight up from the lever. Slowly pull the lever upwards to get an accurate measurement. If your device has a PEAK or MAX mode, activate it to save the maximum effort measured.
#
Parking brake drum and shoes inspection
Remove the 8 bolts securing the drum to the differential yoke, then slip the drum over the driveshaft.
Clean dust and excess grease off all individual brake components.
Inspect brake shoes for uneven wear. Brake shoe friction material must be at least 0.76 mm (1/32") thick. If necessary, replace the brake shoes.
Check for oil, grease or any foreign matter that could compromise brake operation. Make sure friction material of both brake shoes is not cracked or deformed. If necessary, correct the problem, clean the drum surface and replace the brake shoes.
Visually inspect the actuating lever and cam plate. If you see cracks, excessive wear or abnormal deformation on any part, replace it.
Inspect the springs and retaining pins. If you see excessive wear, heat discolouration, severe corrosion or other damage, replace if necessary.
Inspect the adjuster screw (starwheel and its threaded part). The assembly should not be corroded and the starwheel teeth should be in good condition. Replace, if necessary.
Clean the drum's friction surface with brake cleaner. Replace the drum if it is worn, grooved, rusted or oval.
Inspect the internal adjuster cable connected to the actuating lever for wear or damage. Replace, if necessary.
Check the differential pinion oil seal for leak that could contaminate the brake shoes; repair if necessary.
#
Parking brake Functional Test
Make sure there is at least 2 m of clearance in front of the vehicle before starting the parking brake functional test. If the parking brake fails, the vehicle could move forward suddenly.
Apply the parking brake.
Turn the key to “START” to start the bus as usual.
Make sure the parking brake stays on during the self-test.
Depress the brake pedal and press “D” on the drive selector.
Release the brake pedal and fully depress the accelerator pedal. On the multifunction display, a message indicating that the parking brake is applied will appear; this is normal. After 3 seconds with the accelerator fully depressed, the parking brake functional self-test will begin.
During the self-test, the dashboard will display an increasing percentage. Keep the pedal fully depressed until it reaches 100%. Motor torque will also gradually increase to a maximum of 100%.
Be ready to apply brake if the bus starts moving.
The vehicle must remain stationary during the self-test.
If the self-test is successful, "PASS" will appear on the display.